I have been really wanting a dry lot and I finally have one! I wanted to share some photos of the upgrade.
Here are some before pictures that illustrate why you might want a dry lot to preserve your pasture:
 |
| The area where the dry lot is now, all torn up in January. It got worse as the winter progressed. As you can guess from the green grass, last winter started unseasonably late--we had thunderstorms on Christmas! So this shows less damage than typical. |
 |
| Hoof damage near the gate and feeder pad. |
Here are some photos of the dry lot construction process:
 |
| First, the topsoil was stripped and and the subsurface was graded. |
 |
| The stonedust has begun to arrive! The shed pad at the front right corner has a special compacted base. |
 |
| While the grading is done, the grid that will help prevent erosion is laid out to "relax" and spread out. It arrived tightly packaged. |
 |
| Here is the grid getting staked out, to keep it stretched in place while it is backfilled with stonedust. It was positioned across the center of the dry lot to reduce erosion caused by water draining across the surface. |
 |
| Half of the grid has now been carefully filled in with stonedust. It's a bonus that the grid covers the area around the newly-installed Nelson auto waterer because that is likely to be a high-traffic area. |
 |
| Here's a close-up of the grid as it's filled in. |
 |
| Most of the stonedust has now been spread. Dominick the Donkey immediately investigates the modification to his home. |
 |
| The finished pad for the run-in shed, with the four corners staked out and lots of hot tape to keep the horses off the newly seeded areas. |
 |
| Dominick chilling on the eastern edge of the dry lot. You can see that it sits several inches above ground level. |
 |
| The northwestern edge, which curves around to the shed pad. |
 |
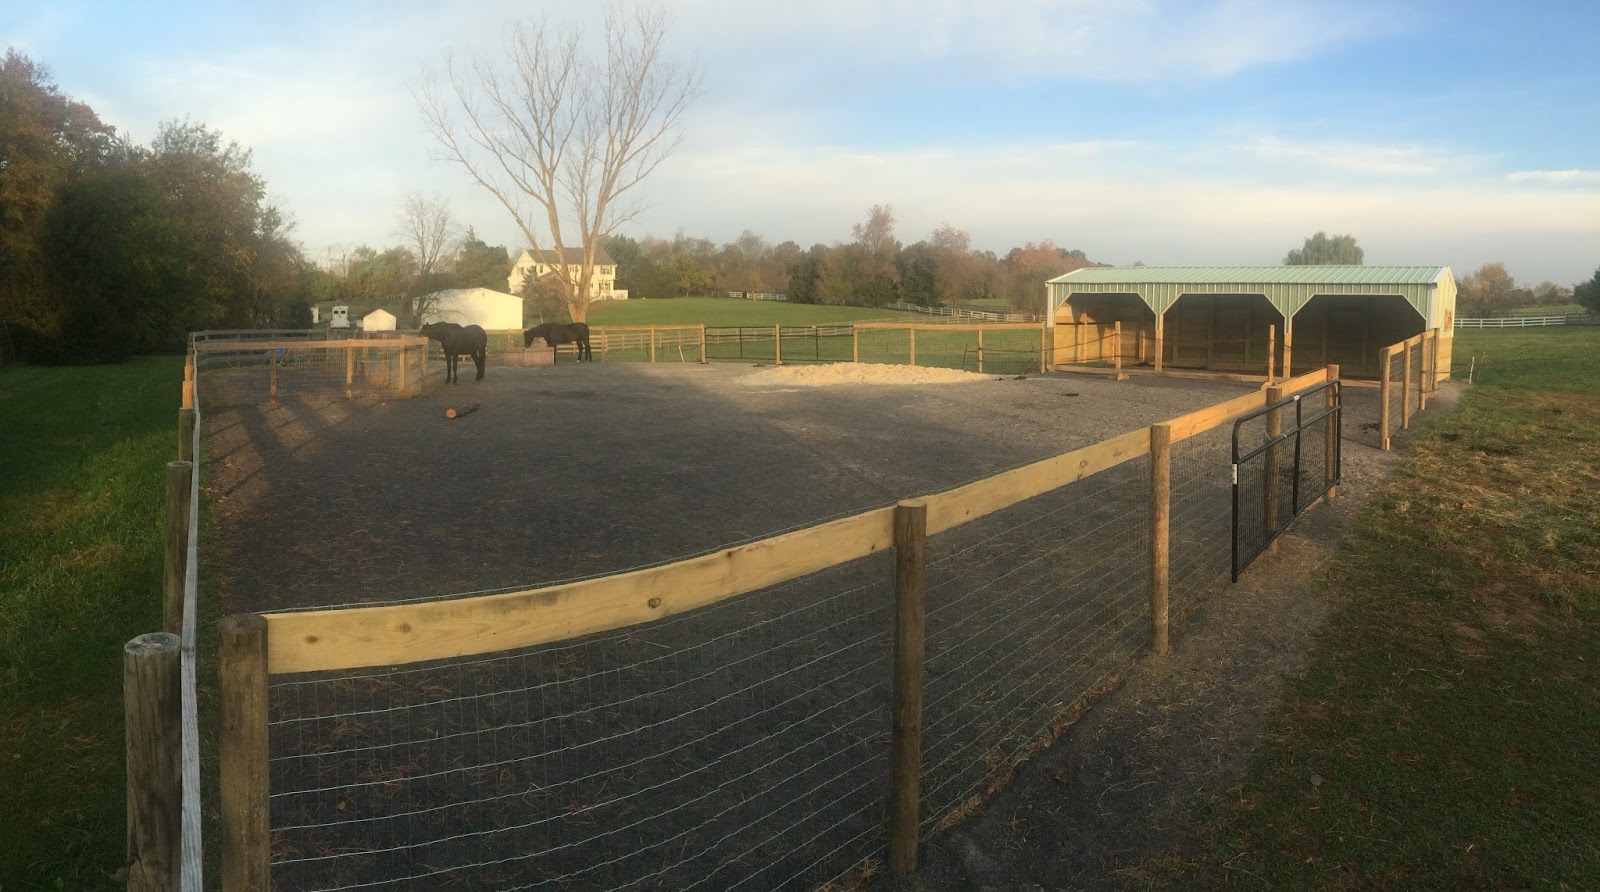
| The fence is up! Horse and donkey investigate the brand-new fence, which is five-foot-high wire mesh with a top board. The gates in this pic will lead to the bottom and middle thirds of the pasture, once I move the Horseguard cross-fencing. The shed will go in the corner above the donkey in this picture. |
 |
Here's a view of most of the space, standing just inside the gate to the barn. Straight ahead is a gate to the top third of the field. Gates to the bottom and middle thirds are on the left (one open). The shed will go in the back left corner.
The shed has now arrived!
I'm happily transitioning the boys to an outdoor lifestyle. Turning in/out is SO much easier now that all I have to do is open and close gates!
The dry lot has a total area of 7,031 square feet (including the pad for the shed). Here are its dimensions per Google Earth:
One future upgrade I'm considering is a scratching post so they don't use the fence and shed (in theory). I'll also be adding a small shed for storing a week's worth of hay.
The dry lot was built by K&L Contracting, who also built my arena. I cannot recommend them highly enough!
I should warn you though that a dry lot like this does not come cheap! The earthwork, stone, and four erosion control grids cost almost $18k. That doesn't include fences, gates, the shed, the Nelson waterer, or running power/water to the shed and the waterer.
Caveat: Even more than other types of construction, excavation work is HIGHLY variable. Even if you want a dry lot exactly the same as mine, it may require a very different construction process depending on your terrain, slope, drainage issues, soil type, etc. Material costs can also be affected by time of year and distance from the quarry. So while I give you my costs as an example, you should not expect yours to be the same!
|


Very cool setup! Is it still working well for you?
ReplyDeleteYes, I love it! The boys lived out 24/7 all winter, days in the dry lot and nights with access to one section of the pasture (they still spent a lot of time eating hay in the dry lot though since there wasn't much grass). That was a lot less work and more flexibility for me than stalling them at night, and they never had to be cooped up. It also saved my pasture to have turnout space when the ground was very wet, though this year winter was mild and pretty dry so it wasn't as big a deal as usual.
ReplyDeleteI apologize if it was mentioned somewhere, but how big is your dry lot? It looks like it has been a comfortable size for your three equines?
ReplyDeleteThanks :)
Froglander... I'm so sorry it took me forever to get the dimensions up and reply to you! They're in the post now. I have to admit, I was sort of hoping Google Maps would update this year and I would be able to post a satellite picture. When you see my crappy drawing, you'll see why. :-)
DeleteExcellent work Libby, looks like its all working really well. Very similar to what we talk about, if you are on Facebook have a look at Equicentral Central we would welcome you as a member or www.equiculture.net
ReplyDeleteMight you share with us the total cost of installing your dry lot, please? Thanks!
ReplyDeleteI'm not sure where you're from but I'm curious how this holds up in winter weather. More specifically snow & could it be bladed off lightly without dragging off all the stone dust?
ReplyDeleteHi! Sorry for the delay replying to you. I have had no issues with winter weather although we haven't had a really rough winter since I built it. We do get snow here (in the mid-Atlantic region) but it typically melts within a week, especially in high-traffic areas and under the nice dark stonedust. I clean the dry lot daily in wet weather so that manure doesn't mix into the footing. You could definitely clear it with a blade if you're careful not to catch the edges of the erosion grid. I just haven't had occasion to do it yet.
DeleteHave you had any problems with the hooves sinking into the openings of the geogrid? Have you had to add fill to the top over the years? Thanks
ReplyDeleteHi! No, I haven't had issues with that because the stonedust compacts quite well. I haven't had to add footing yet either. There has been some runoff despite the grids, and the grids are exposed in some areas but not enough to cause problems.
DeleteHi Libby - not sure if you're still updating here, but I would love to know more about the grid material. I thought it was light hoof, but a careful re-reading later I realized it's not, and would love any information you have about it :)
ReplyDeleteHi! My grid was a general-use grid for driveways and similar applications, sold by a local-ish vendor. Since it was not specifically marketed for equine applications, it cost a little less. I'm sorry to say that I don't know the brand name though. I believe it's along the lines of the DuPont Ground Grid: https://www.dewittcompany.com/product/dupont-groundgrid/. The invoice shows it cost the installer $2/sq ft. We used four 230-square-foot grids and ran them perpendicular to the slope of the dry lot. Sorry I don't know specifics but I hope that helps!
DeleteHi, just curious if you have any areas on the Lighthoof where horses pee in the same spot and if this has solved the issue of urine puddling up? Thanks
ReplyDeleteI have not tried that specifically, but I would think it would work as long as the area also has a bit of a slope to allow the urine to drain, or the material in the grid is porous.
Delete