Dear readers,
I realize it's been a long time since I've posted! A few people have requested a new post or a post specifically on this topic and I feel remiss for keeping you waiting so long. (I
love reader feedback, by the way!) I've been writing this post little by little over time, wanting to get a feel for the compost system before I passed judgment. Without further ado...
It has been about a year since I built my bins and started using an aerated compost system designed by
O2 Compost. Now that I have some familiarity with the system, below are the pros and cons to aerated compost as I see them (I'll elaborate more on the cons because the pros are pretty much what O2 Compost advertises, and I already discussed them a bit in
this post).
Disclaimer: I am by no means a composting expert. The following is based on my experiences over the last year and on my understanding of the O2 Compost materials and discussions I had with them before and after purchasing my kit. If any of you readers have additional or contrary thoughts, please share them with us in the comments section!
Pros
- No need to turn the pile, which is an unpleasant and laborious task.
- Quicker composting time compared to non-aerated systems.
- Ensures adequate heat to kill parasites and weed seeds.
- Returns nutrients to your soil.
- Self-sufficiency: no more relying on someone else to come haul your manure off (this was a major factor for me, as my long-time manure remover retired and the person who took over was not living up to his standards).
- Low monthly cost, after start-up (your cost will pretty much just be your time/labor when emptying the bins, fuel/maintenance for your tractor, and maintenance for your spreader).
- Speaking of start-up costs, you may be able to defer some of your costs through a local environmental conservation program, especially if you're in a sensitive watershed area.
- Excellent tech support/customer service if you go through O2 Compost. I found them to be very helpful both before I made the decision to purchase the system and after I built it. I had a couple of questions and issues over the last year, and Harold in particular has been great to work with.
- My bins are much prettier than the dumpster I used to use (even if I still haven't gotten around to staining them like I planned):
 |
| Before and after! |
Cons
- High start-up cost, especially if you don't already own a tractor and/or spreader. While it's theoretically possible to compost without a tractor and spreader, I wouldn't want to do it. I can't imagine any other efficient way to distribute all that composted waste. If anyone knows of one, please let us know! Not counting the tractor, which I already owned, my start-up costs were:
- $699 for kit from O2 Compost, purchased through Amazon with free shipping (includes bin blueprints, instruction manual, blower, thermometer, and some PVC tubes that I actually didn't use because they weren't the right size for my 6x6x4 system, and when I bought tubes at the local Home Depot the diameter didn't match up so I couldn't use the connections O2 Compost sent either)
- $1,225 for lumber, hardware, Suntuff lids, an extension cord to power the blower, and PVC to run the extension cord under the driveway.
If you already own a tractor and spreader and this is the extent of your costs, a compost system is much more likely to make sense financially. I had a really economical manure removal service that charged $60 per removal for a small wooden dumpster that held about 4.8 cubic yards and fit well in the space I had available. My waste disposal costs averaged out to $38/month over the first 3 years I had my farm, before I built the bins. However, all of the alternative services in my area charge much, much more (like $275 per month for a giant dumpster that wouldn't fit well in my space, and had to be removed once a month no matter how full or empty it was), and I just couldn't stomach that. If my composting costs were limited to the kit and lumber (total of $1,924), the system would have paid for itself in 6.4 years ($2,924 / $38.28/month
= 76 months) vs. using the economical disposal service or merely 10 months vs. using the more expensive $275/month alternatives, which would be pretty good. Unfortunately I also ended up having to pay...
- ...$3,965 for a new 50-cubic-foot ABI PTO-driven spreader
The spreader is where composting got me, financially. I already discussed this in
my post on spreading but briefly, I planned to buy an old used spreader for about $1,000 and then discovered that all of the used spreaders I could find were either too large for my 23-horsepower tractor or painfully small (as in, a painful number of trips to the pasture to empty one bin). I had already built the bins and partially filled one by the time I figured this out, so I was kind of stuck. Now my system will not pay for itself until almost 13 years have passed. 😣 (I like to make myself feel better by using the alternative price of $275/month though, which makes it only 1.8 years.) Moral of the story: if you think you might be interested in a compost system and have a smaller tractor, you might want to keep an eye out for appropriate used spreaders for a while before you decide to invest. If you don't have a tractor at all, maybe you could train your horse to do this:
 |
| Is there something meta about a horse hauling its own waste around a field? |
- Emptying the bins is labor-intensive. I have a tractor with a front-loader and that works for a few spreader loads, but I can't scrape all the way to the ground because of the aeration tubes plus my bins are deeper than the loader arms are long. The last two 50-cubic-foot spreader loads, I have to shovel by hand. My hubby helps when he can but for either of us, it is literally back-breaking work. (Also a bit smelly! Which bothers him more than me.) It takes about 3 hours for me to empty one 6x6x4 bin and spread it on the pasture. (For whatever it's worth, I drive about 400 feet from the bins to the main entrance to my pasture, according to Google maps.) Obviously if your front-loader and/or spreader are bigger, you can do it faster. If you buy one of those tiny spreaders, good luck. It can be a one-person job but it does go faster if you have a second set of hands to hook up and unhook the spreader in between loads and shovel the muck into the front-loader while you dump the front-loader into the spreader as it fills (definitely take that job if you can, the shoveling sucks! 😜).
- You need a good way to get waste into the bins in the first place. I already had a retaining wall with a walkway up it that I used for my dumpster, so I built my bins up against that and can dump the wheelbarrow into them. I think this is the ideal layout. When I first built my barn and didn't have that retaining wall yet, I mucked into small carts and lifted the muck up into the dumpster, and that was awful. If you have any sort of physical limitations, it may not even be possible. You could also muck into a front-loader but personally I don't want to break the tractor out every time I pick a stall, and my loader isn't large enough for the overnight waste of 2-3 stalls so I'd have to make multiple trips. Ramps are another option but a ramp with 4' of rise needs to be pretty long for you to push a full wheelbarrow up it safely. You'll also need to make sure it isn't slippery because that's a recipe for injury (if you've ever faceplanted and been run over by your own wheelbarrow before, you know that's not something you want to experience twice). The O2 Compost website has lots of examples of finished systems so you can see how other people have made theirs accessible for dumping.
 |
| To fill my bins, I push my wheelbarrow up a gravel path and dump it in from above. The path and hinged plywood ramp were designed for use with my old dumpster and continue to work well for the compost bins. |
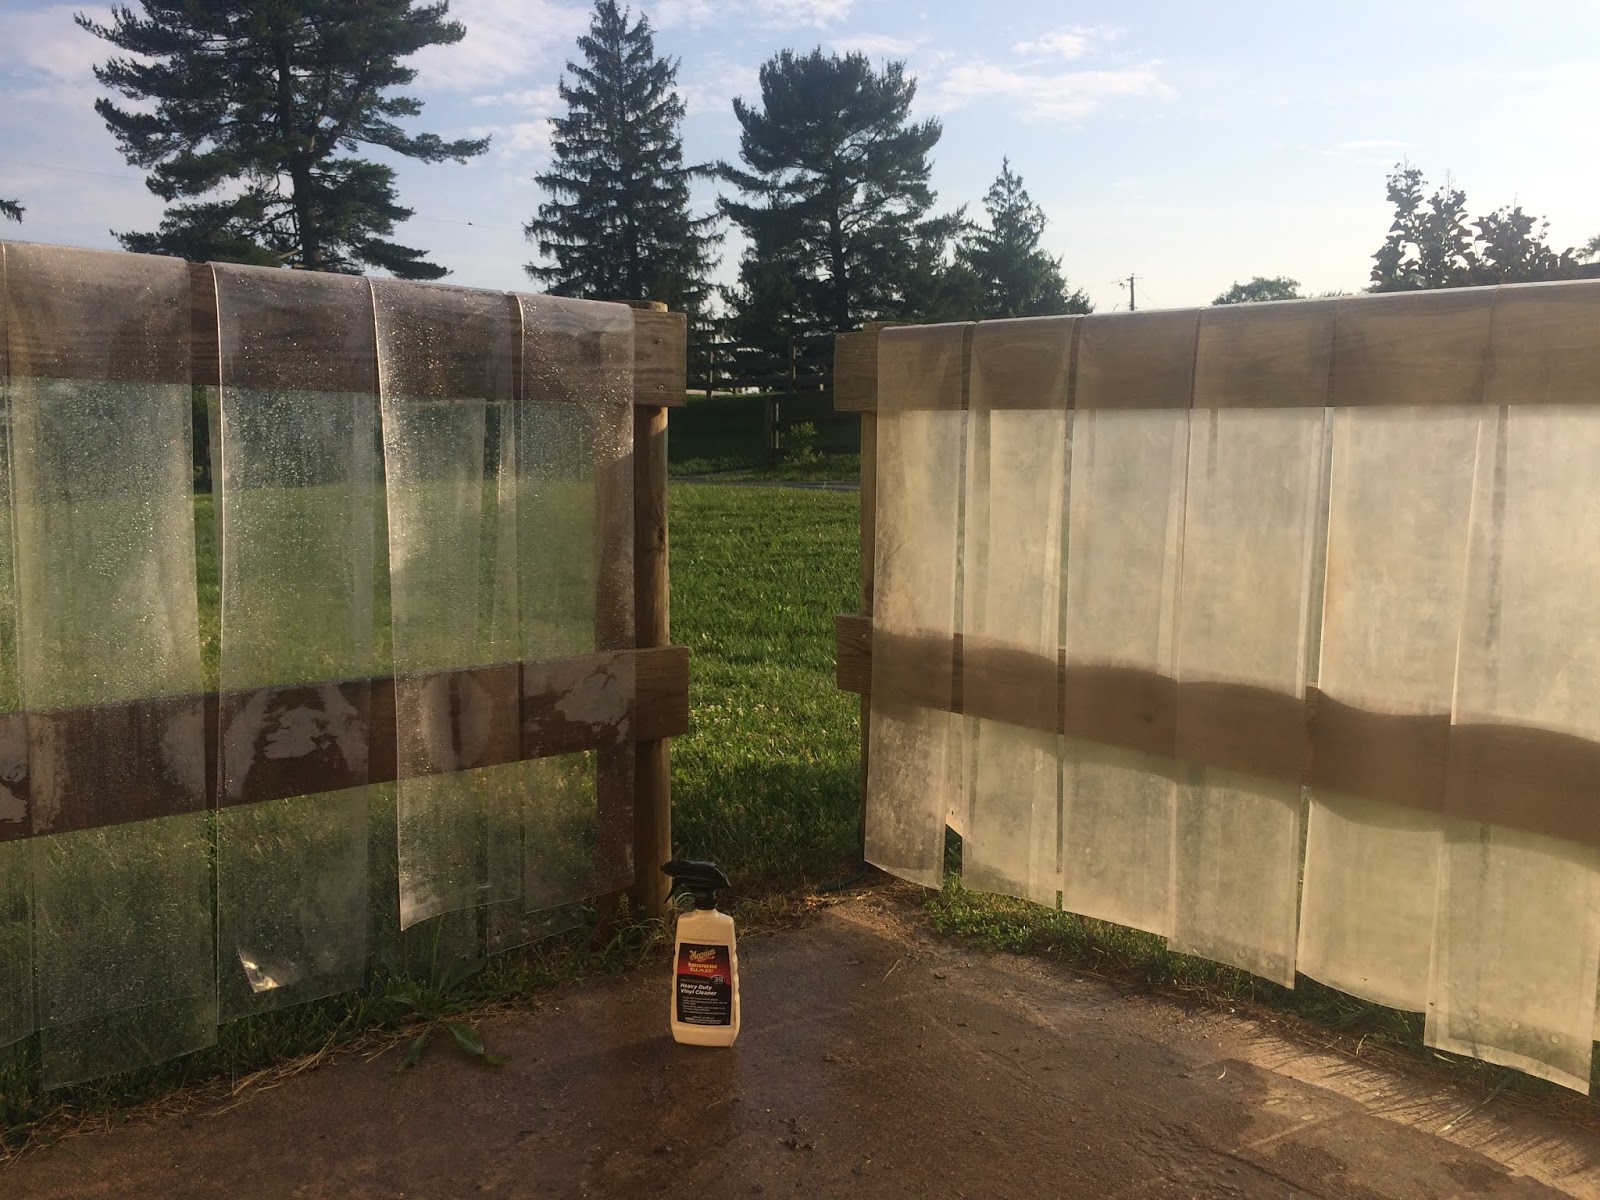
- Unless you can let the waste cure for a long time, it will still very clearly be stall waste, not true compost. Theoretically, given enough time to cure, the stall waste will lose its distinctive smell and appearance and turn into uniform, crumbly, dark, beautiful compost. That probably does happen if you can create good conditions and give it enough time. However, I have never once had this happen, perhaps because the longest I've ever been able to let a full bin sit is about 6 weeks. If you have fewer horses, bigger bins, or more bins, you may be able to achieve this ideal. Also, there never seems to be exactly uniform airflow or composting so sometimes there's a mass of dark, wet, sticky, fresh-looking-and-smelling manure in the middle of the bin. Hubby really doesn't like those parts! He never used to think horse manure was offensive but after helping me with this compost system for a year, he really does.
 |
| Still recognizably stall waste. |
 |
| Lots of manure balls still intact. |
Cautions (these aren't drawbacks to the system so much as things to think about before you invest or when you're planning your system)
- Depending on where you live, it may be environmentally unsound or even illegal to spread manure year-round. It's not the best practice in the winter when the ground is frozen and nutrients tend to run off into surface water rather than working their way into the soil (for more on best practices for winter spreading, see here). If it freezes where you are (or if your spreading area is ever so wet for so long you can't or don't want to drive a tractor in there), you'll need a plan for dealing with the waste until you can spread it.
- If your horses are stalled a lot or you pick dry lot/pasture waste into the bins, the Micro-Bins (4x4x4, 4x6x4, or 6x6x4) will fill up fast, unless maybe you only have one horse. Currently my horses aren't getting turnout due to lameness, and the waste of two 1,500-lb horses and one ~300-lb mini-donkey fills a bin in 2-3 weeks, yikes. When one bin is full, I have to spread the contents of the other immediately or I will have nowhere to put my muck. My waste therefore isn't getting any time to cure, though at least it's heating up enough to kill parasites and weed seeds (vs. being spread directly on the field). I wish I could have built a third bin but it just wasn't possible with the space I had.
- "Input" composition matters! In a few ways:
- If you pick dry lot/pasture waste into the bins, it will not have the proper composition for aerated composting. Pure manure is too wet to heat up properly and too dense for good airflow. The thought of buying nice clean sawdust or something similar for the sole purpose of mixing it with horse crap really offends me. So, I drag the pastures rather than pick them and spread dry lot pickings directly on the pasture as well. There are other things you could mix in that might work, like yard trimmings, but I'm not sure exactly what composition they'd have to have.
- O2 Compost recommends a porous layer over the pipes (e.g., coarsely ground brush/yard trimmings--but watch out for toxic plants if you're spreading on your pasture) and a clean buffer layer (e.g., finished compost, clean shavings) at the top of the bin. You cannot just fill the whole thing top to bottom with stall waste and expect ideal results, due to air circulation and insulation issues. So, you will need to plan what to use for these layers and you may need to pay money for them.
- If you have a threshold that the tractor can't cross without doing damage, try not to make your bins deeper than your tractor can reach. See above about how much it sucks to shovel horse crap out of the bins by hand, and try to minimize that as much as you can. I did not think about this minor detail when I planned my bins.
- If you can, set your aeration pipes down in the base so you have a smooth surface to scrape the manure out of. I believe this system in New York has that, and you can see how much easier it would make emptying the bins: Pleasant View Farm O2 Compost system (I also like the roof rainwater collection idea!).
The Bottom Line
This post may look negative because I devote a lot more words and space to the cons, but my overall opinion of aerated composting is in fact positive. I just want you people to know what you're getting into! I think that if you want to be self-sufficient in horse waste disposal, it is the way to go (especially if you can pay someone to shovel out the bins for you!) because it's safer and in some ways more convenient than spreading directly on the fields, and more efficient than traditional composting.
That said, if money and giant-dumpster space were no object, I might go back to having my manure hauled off just because it is so much more convenient. No worrying about whether your mixture is correct or wet enough or dry enough or getting enough air (although to be honest, I haven't spent a whole lot of time worrying about any of this, except to make sure it's staying hot enough for long enough to kill parasites, and mine has turned out okay). No shoveling and spreading. No watching the bin fill up faster than you expected and knowing that soon, you are going to have to shovel and spread. Just pick up your phone, write a check, and your stall waste goes poof! (Of course, if your manure disposal service is not reliable or tends to crash into your vehicles/buildings or destroy your driveway, it might not be this easy. If that's the case, definitely consider aerated composting.)
But since having my waste hauled off stopped being a good option for me, I think my best alternative was aerated composting. I'm also glad I went through O2 Compost because even though you can buy all of the components separately (and I didn't really use their blueprints because they didn't offer any 6x6x4 plans at that time), you get the benefit of their technical support for as long as you have the system.