I
considered a lot of options for finishing the tack room walls. They are
insulated with lovely pine board paneling and I wanted to give the wood a
finished appearance without detracting from the natural look of the pine.
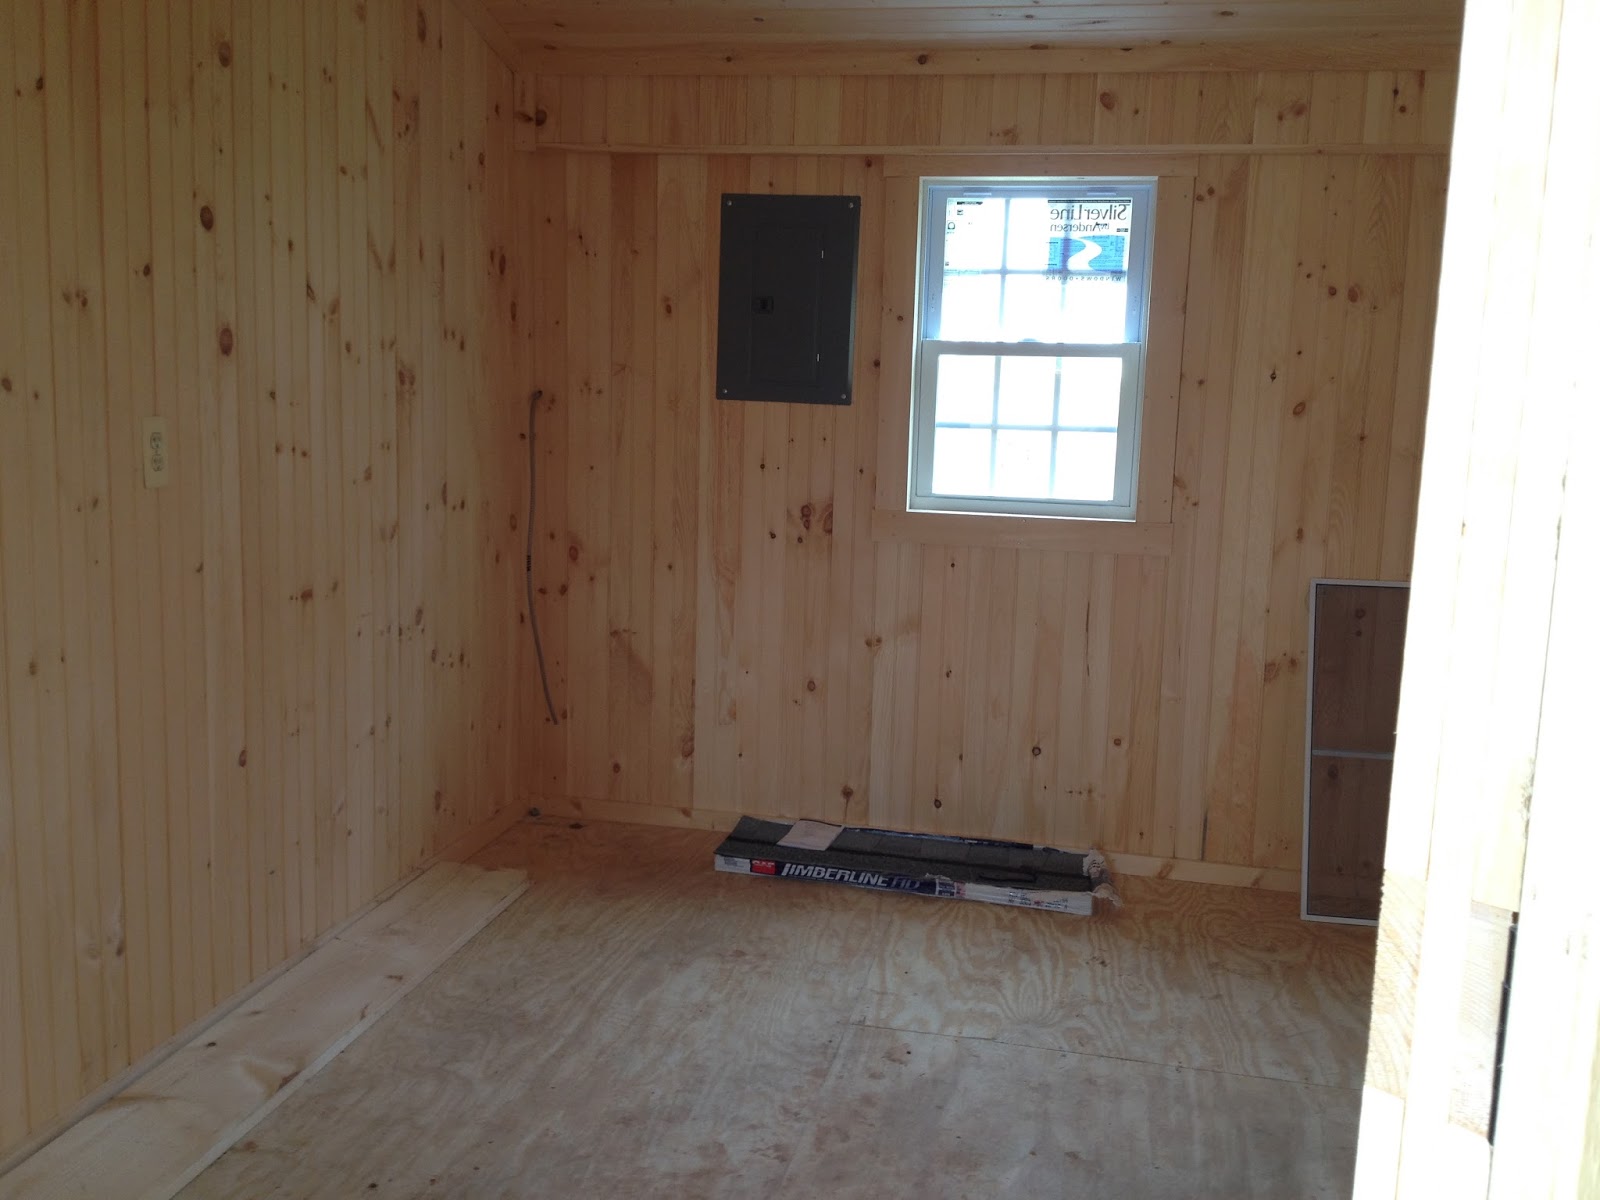
Here's what the tack room walls looked like unfinished:

Initially I thought I would finish them the same as the interior of the barn (the decision process for that is a whole other story). Then I decided it would be easier to do the tack room walls before all of the cabinets, appliances, and racks were installed so I decided to forge ahead quickly, before I was ready to do the rest. Plus, the tack room really doesn't suffer the same stresses as stall walls (hopefully), so it doesn't need the same protection.
I
drew my final inspiration from this blog post, which shows pictures of exactly
what I wanted my tack room walls to look like. I asked the blogger what she
used and she pointed me to Minwax stain in Ipswich Pine. Unable to find that
immediately (and in a self-imposed rush because the plumbers were coming), I
tried Minwax Wood Finish in Golden Oak on a small
corner that would eventually be covered by a base cabinet. It was awful!
I am handier than some women but not very craftsy, and this was the first time
I had ever stained anything. I hoped after it dried it would look better, but
it was a blotchy, yellow mess. This photo doesn't even do it's hideousness
justice:

Lesson learned: Try your chosen finish in a small area that will eventually be covered up.
Fortunately
I found a quart of the same stain in Ipswich Pine at my favorite local hardware
store, where they are happy to help you and actually know what they're talking
about. I knew it wouldn't be enough so I ordered 2 gallons but in the meantime
I started with the quart. The oil-based stain seemed weirdly watery and sludgy
to me but it looked pretty nice so I did the whole bottom half of one wall,
which the base cabinets and washer/dryer would eventually cover anyway. Of
course, when the gallons arrived they were nice and oily and uniform, so
clearly something was wrong with the quart.
Lesson
learned: Try to get all of your stain in one batch to avoid
variations in ultimate appearance.
Thankfully
the stuff I had done with the quart would mostly be behind other things. Here
is what the Ipswich Pine looks like on my pine paneling (the ceiling and
molding are shown unfinished for comparison):

It
really doesn't look much like the tack room that inspired me (much redder), but
it sounds like we used slightly different products because hers was a
stain/poly combo and I couldn't find anything like that in Ipswich Pine (maybe
it's been discontinued?). Nevertheless I really like the look and it was easy.
This is how I did it, learned through trial and error:
- Cover up outlets, the edges of breaker boxes, etc. with blue painters tape.
- Use a 4" paintbrush to apply Minwax Pre-Stain Wood Conditioner (not the water-based one). No need to saturate it, just apply it more or less evenly and enough that the wood looks wet. I used up 2 oz of wood conditioner on a portion of the wall that was about 7' x 7'. (Yes, 2 oz was the most that the local hardware sold but you can get quarts at Home Depot.)
- Wait 5-15 min for the wood conditioner to absorb, then wipe off any excess with a clean cloth. I didn't have any excess so maybe that means I didn't use enough, but the effect was good.
- Use a 4" paintbrush to apply stain to a board or two at a time, in the direction of the wood grain. I did two boards at a time, starting at the top of the boards and working my way down. It doesn't need to be perfectly uniform or very heavily coated. For a while my wonderful boyfriend helped me and he slathered a lot more on than I did, but when I wiped it off the results were exactly the same, so I think it's just a waste of stain. For the ceiling and corners like under the windowsill, use only a light coat. You don't want this stuff dripping down on you from the ceiling. If you let it drip off windowsills onto the wall below you will get some unattractive drip marks, so be sparing, watch carefully, and wipe them off as soon as you see them.
- Continue applying, one to two boards at a time, until it's time to wipe the stain off the first boards you did. I would start my stopwatch when I started staining, so I could keep on track. My goal was about 6 minutes but I found the stain to be very forgiving of any variation. I figured that I applied to two boards per minute, so I would spend a minute wiping them, then move on to the next until I was done wiping and it was time to stain again.
- Using a cotton cloth, wipe the stain off the boards so there are no wet areas left. I squished the cloth into the grooves between the boards to get the stain out of there. That wasn't entirely successful but it looks fine to my eye. (My perfectionist brother might disagree. To me it was more important to get stain into the cracks so their wouldn't be obvious light-colored areas in the midst of the stained ones, than it was to get the stain back out again.)
- Let the stain dry.
- Watch out where you lean or touch while you're working. I left a couple of stainy finger- and elbow-prints by catching my balance on a stained wall while doing the ceiling.
I
did not sand, and I did not do a second coat. I tried different things in small
patches that would eventually be covered, and found that sanding was not worth
the trouble but wood conditioner did even out the color and make it rich enough
that a second coat wasn't necessary. At $11/quart it's worth it, and it's very
easy to apply. Another suggestion that I tried but did not ultimately use came
from a professional cabinet finisher who happened to be at the local hardware
store when I was. Seeing the blotchy results of the golden oak in a cell phone
picture, he suggested that I rub lacquer thinner over the boards before
staining to help draw any sap out and equalize moisture levels. He seemed to
have more confidence in this technique than in wood conditioner. I did try it
but I'm not sure it made much of a difference and the fumes were ghastly.
Ultimately I did not have the same blotchiness issues with the Ipswich Pine as
I did with the Golden Oak, so I just ended up with a bunch of lacquer thinner
that I don't need.
Lesson
learned: Try different combinations of preparatory steps and
finishes in small areas that will eventually be covered up (or scrap wood
that's identical to your walls). Purists might disagree, but you may find that
you don't need to do annoying, time-consuming things like sanding to get the
look that you want.
Also,
a few final words on preparation. It was really annoying to be done for the day
then realize I had no good way to clean my brushes. I ended up pouring paint
thinner over the brush into an empty sour cream container, but an actual metal
pail or something would have been better. If you are going to be using the
brush again, squeeze out the excess stain, wrap it in paper towels, then wrap
it in saran wrap and it will stay moist and not stiffen. Also, wear gloves
because stain will make your hands stink like chemicals.
In addition to staining the walls, I installed laminate flooring for a finished look. Here are some pictures:
 |
| Unfinished floor. |
 |
| Laminate flooring installed. |