Nature is a formidable opponent on any horse farm. Grass grows where you don't want it and doesn't grow where you do. Mice drown in your water buckets. Birds steal insulation from your walls to make their nests. Water is an especially strong force that collects in low areas or washes out your precious footing.
To limit damage caused by erosion, grids can be used under footing in all sorts of areas around the farm. In this post I'll talk about my experience using grids in two different areas, my dry lot and around my automatic waterers.
What are Grids?
The grids I'm talking about are rubber or plastic lattices that you lay on the ground and fill in with some type of footing. They help hold the footing in place despite the best efforts of water and horses' hooves (another formidable natural opponent!). People put them in their stalls instead of mats, in dry lots and runs, around gates, and even under their riding arenas.
There are a ton of brands available these days, such as
Lighthoof,
Hoof Grid,
Stable Grid, and
EcoGrid.
There are also brands that are not specific to equine uses, because grids like these are also used for general landscaping and road construction (for example,
DuPont makes a bunch of different grids that look pretty similar to the products above). I'm always interested to see how more generic products compare to those marketed to horse owners, and whether there's a mark-up because "horse people are rich" (haha, maybe we were before we had horses!).
Grids for the Dry Lot
When planning my dry lot, erosion control was a definite concern. Most of my pasture has a slight slope, which helps water run off into the culvert below the pasture rather than collecting where it can cause mud pits. The problem is that the dry lot footing would also tend to flow downhill. We wanted the dry lot to have a slight slope for drainage, but I didn't want to put in a dry lot only to watch all my expensive footing migrate downhill.
The fabulous Dave Wisner of K&L Contracting suggested a grid system and mentioned that he had recently learned of a locally available system very similar to Lighthoof but not marketed for equine use. It cost less than equine-specific grids and he was willing to let me buy it at cost ($2/square foot) and install it for free, to see if he wanted to use it in future projects. I was happy to go for it.
My dry lot is pretty large (about 7,000 square feet), so putting the grid all over would have cost more than I wanted to spend. Dave decided to position it strategically across the slope of the dry lot, perpendicular to the flow of any rain runoff. He did one strip across the center of the dry lot, where it starts to slope more, and another strip near the gate. Conveniently, the center strip also covered the area in front of the Nelson autowaterer.
Here are a few photos of the grid (for more photos of my dry lot construction, see
this post):
 |
| Here is the large strip of three grids that went across the center of the dry lot. |
 |
| Close-up of the grid. You can see that it looks an awful lot like Lighthoof, pictured immediately below. |
 |
| Photo from Lighthoof.com. |
The dry lot has been there for 3.5 years now and I'm very happy I decided to use the grid. After a heavy rain I can see where water flowed across the surface of the dry lot, and where the grid slowed it down and kept it from causing erosion. There's been some washout near the gate, around the edges of the grid, so I think it would be pretty bad if the grid weren't there. These recent photos show how the dry lot has held up over time:
 |
| Right after heavy rain you can see where there would likely be gullies if not for the grids. |
 |
| Erosion has exposed the edges of some of the grids. It may be time to add a bit more stonedust in some areas. |
 |
| This is the upper portion of the dry lot that doesn't have grids but hasn't washed out because it is relatively flat. |
If you are planning a dry lot with more than maybe a 1-2% grade, I would highly recommend splurging on grids to prevent frustrating and expensive erosion.
Here's an example of just how frustrating erosion can be. One place we should have put grid but didn't was on the sloped walkway that led up to the gate of the dry lot, and the erosion there was so bad that I later had it paved. I've never had any luck filling in washed-out areas. Even if you tamp the filler down, it's always softer than the area around it and gives water the path of least resistance, so after the next heavy rain you're back where you started--or worse, as the gully widens every time. For sloped pathways I definitely recommend grids or asphalt (note: run over the fresh asphalt with Bobcat tracks to roughen it up for traction--you do not want to be leading horses down sloping asphalt that's smooth like a driveway!).
 |
| This is about 8 months after the dry lot was built. I'd already tried filling the washed out areas numerous times, only to have them wash out again. This is when I decided I needed to pave the sloped part of the path. |
 |
This angle shows how deep and treacherous the washed-out gullies were. Not a great place to be leading horses!
|
 |
| The roughened asphalt ramp is so much safer and lower-maintenance! |
 |
Two years after paving, there is significant erosion at the end of the asphalt ramp. In retrospect, I should have extended the ramp to where the ground was more level.
|
 |
In fall of 2020 I added three rows of Earth Horse Grid to the end of the ramp, hoping to make the path safer and forestall further erosion.
|
 |
Here is the grid freshly filled with stonedust. We haven't had significant rain yet so I'm curious to see whether it helps with the erosion issue.
|
Earth Horse Stall Grid System for Around the Waterer
In the spring of 2018 (when the corral behind the barn was about 3.5 years old) I noticed a low spot forming around my Bar Bar A waterer in the corral behind the barn. The horses were causing this by standing in the same spot every time they wanted to drink (and I have one really violent stomper who has created a noticeable low spot in his stall, despite the heavy mats and compacted base). Once a low spot like that starts to form, water starts collecting there, the area gets muddy from tiny bits of manure, hay, and stall waste flowing down into it, and it becomes a vicious cycle.
After filling the hole in with fresh stonedust only to watch it reappear within a week, I decided to invest in some grids. This time, needing to cover only a small area, I went to Emge Equine Services, a local supplier that sells stall systems, mats, pavers, and the Earth Horse Grid. Their grid is a rubber-like material that comes in interlocking 2'x2' squares. Each square cost $9.50 plus tax, so $2.52 per square foot. I did see some similar options online that were slightly lower-priced, but I would have to deal with shipping and I like to support local businesses.
I started with the side of the waterer that had the bigger hole and decided that a 4'x6' rectangle of grid would cover the space well. I wanted the top of the grid level with the top of the footing, which meant I had to build it up where the hole was deepest and dig down around the edges. The digging down part was quite labor-intensive because when stonedust compacts it is almost like concrete. I used a shovel with a pointy tip to chip away at it. I intentionally timed my project for after some significant rain, because I definitely wouldn't want to do that job when the stonedust is dry and hard!
Here's what the low spot looked like before:
 |
| This picture doesn't quite do it justice, but if you look at the fencepost to the left of the waterer you can see how much lower the footing in front of the waterer has gotten. Near the fence you can see mud that has started to form (Yes, I have learned that mud can form from thin air! Well, not air exactly but little bits of organics like manure, hay, dirt, and stall bedding that are too small to pick up with a pitchfork and somehow eventually congeal into brown goop). |
Here are some photos of the installation process:
 |
| Conveniently, the first 2'-wide section fit perfectly between the fence and the waterer. Here I have leveled an area for it, under the close supervision of Dominick the Donkey. |
 |
| The first row of grids is in place and the donkey appears to approve. |
 |
| I made the mistake of covering the first row before putting in the second, which meant I had to use a hoof pick to scrape and brush away the stonedust from the tabs that allow the grids to interlock. I felt like a paleontologist. |
 |
| The tools I used for the job. I also used a jigsaw to trim one grid to fit around the waterer. Later when I had to trim a little more off, I realized that a pair of trauma shears could do the job too, but who doesn't enjoy using a jigsaw? |
 |
| The third row was the worst to prepare because the stonedust was so compacted that leveling the space was like chipping away at concrete. All six grids are in place now and I'm ready to take stonedust back over them. You can see (maybe) that I tried to maintain the slope of the dry lot, which carries water away from the barn. |
This is the final outcome:
 |
| With the stonedust in place, you can't even tell the grids are there but hopefully they'll do their job invisibly. |
 |
| "Something is different here but I don't know what..." |
The grid has done its job and held up very well. In the below photo taken almost two years after installation, you can see that the area is still level and there is no mud. Pretty good outcome for $60 of materials and a few hours of labor! Confession: I still haven't gotten around to adding grid to the other side of the waterer. It doesn't seem to need it though and I do have some other uses in mind for the remaining pieces of grid.
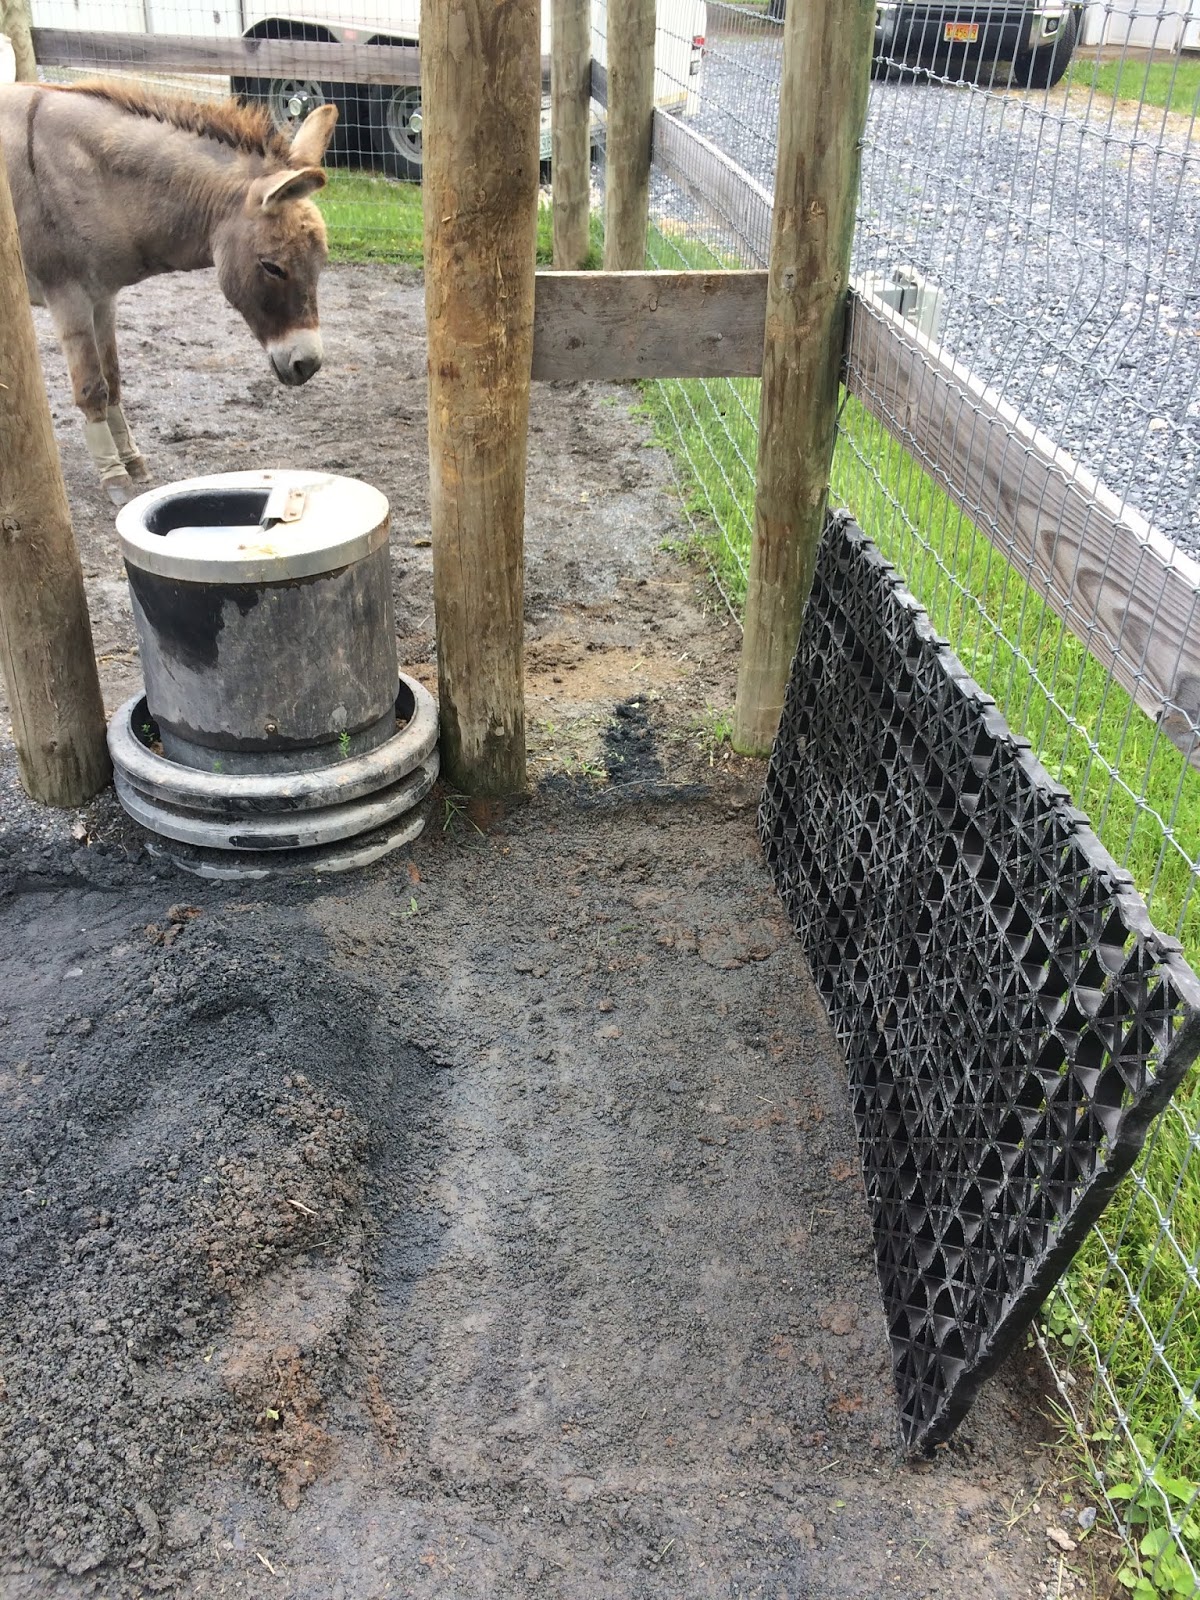
 |
| You can see the edges of the grid, but no mud! (I added the barrel around the waterer because I had a horse that loved to stick his feet in it, dirtying the bowl and clogging up the filters with stonedust. Footsy horses go in the stall on the far side, and the near side is cut lower so that Dominick the Donkey can still drink.) |
If I'd known then what I know now, I would have used grid for the runs behind the barn too, which have a significant slope. Between erosion and selective compaction from horses walking more in some areas than others, the corrals have turned wavy. Thankfully though there are no gullies deep enough to turn ankles like the ramp to the dry lot!


No comments:
Post a Comment