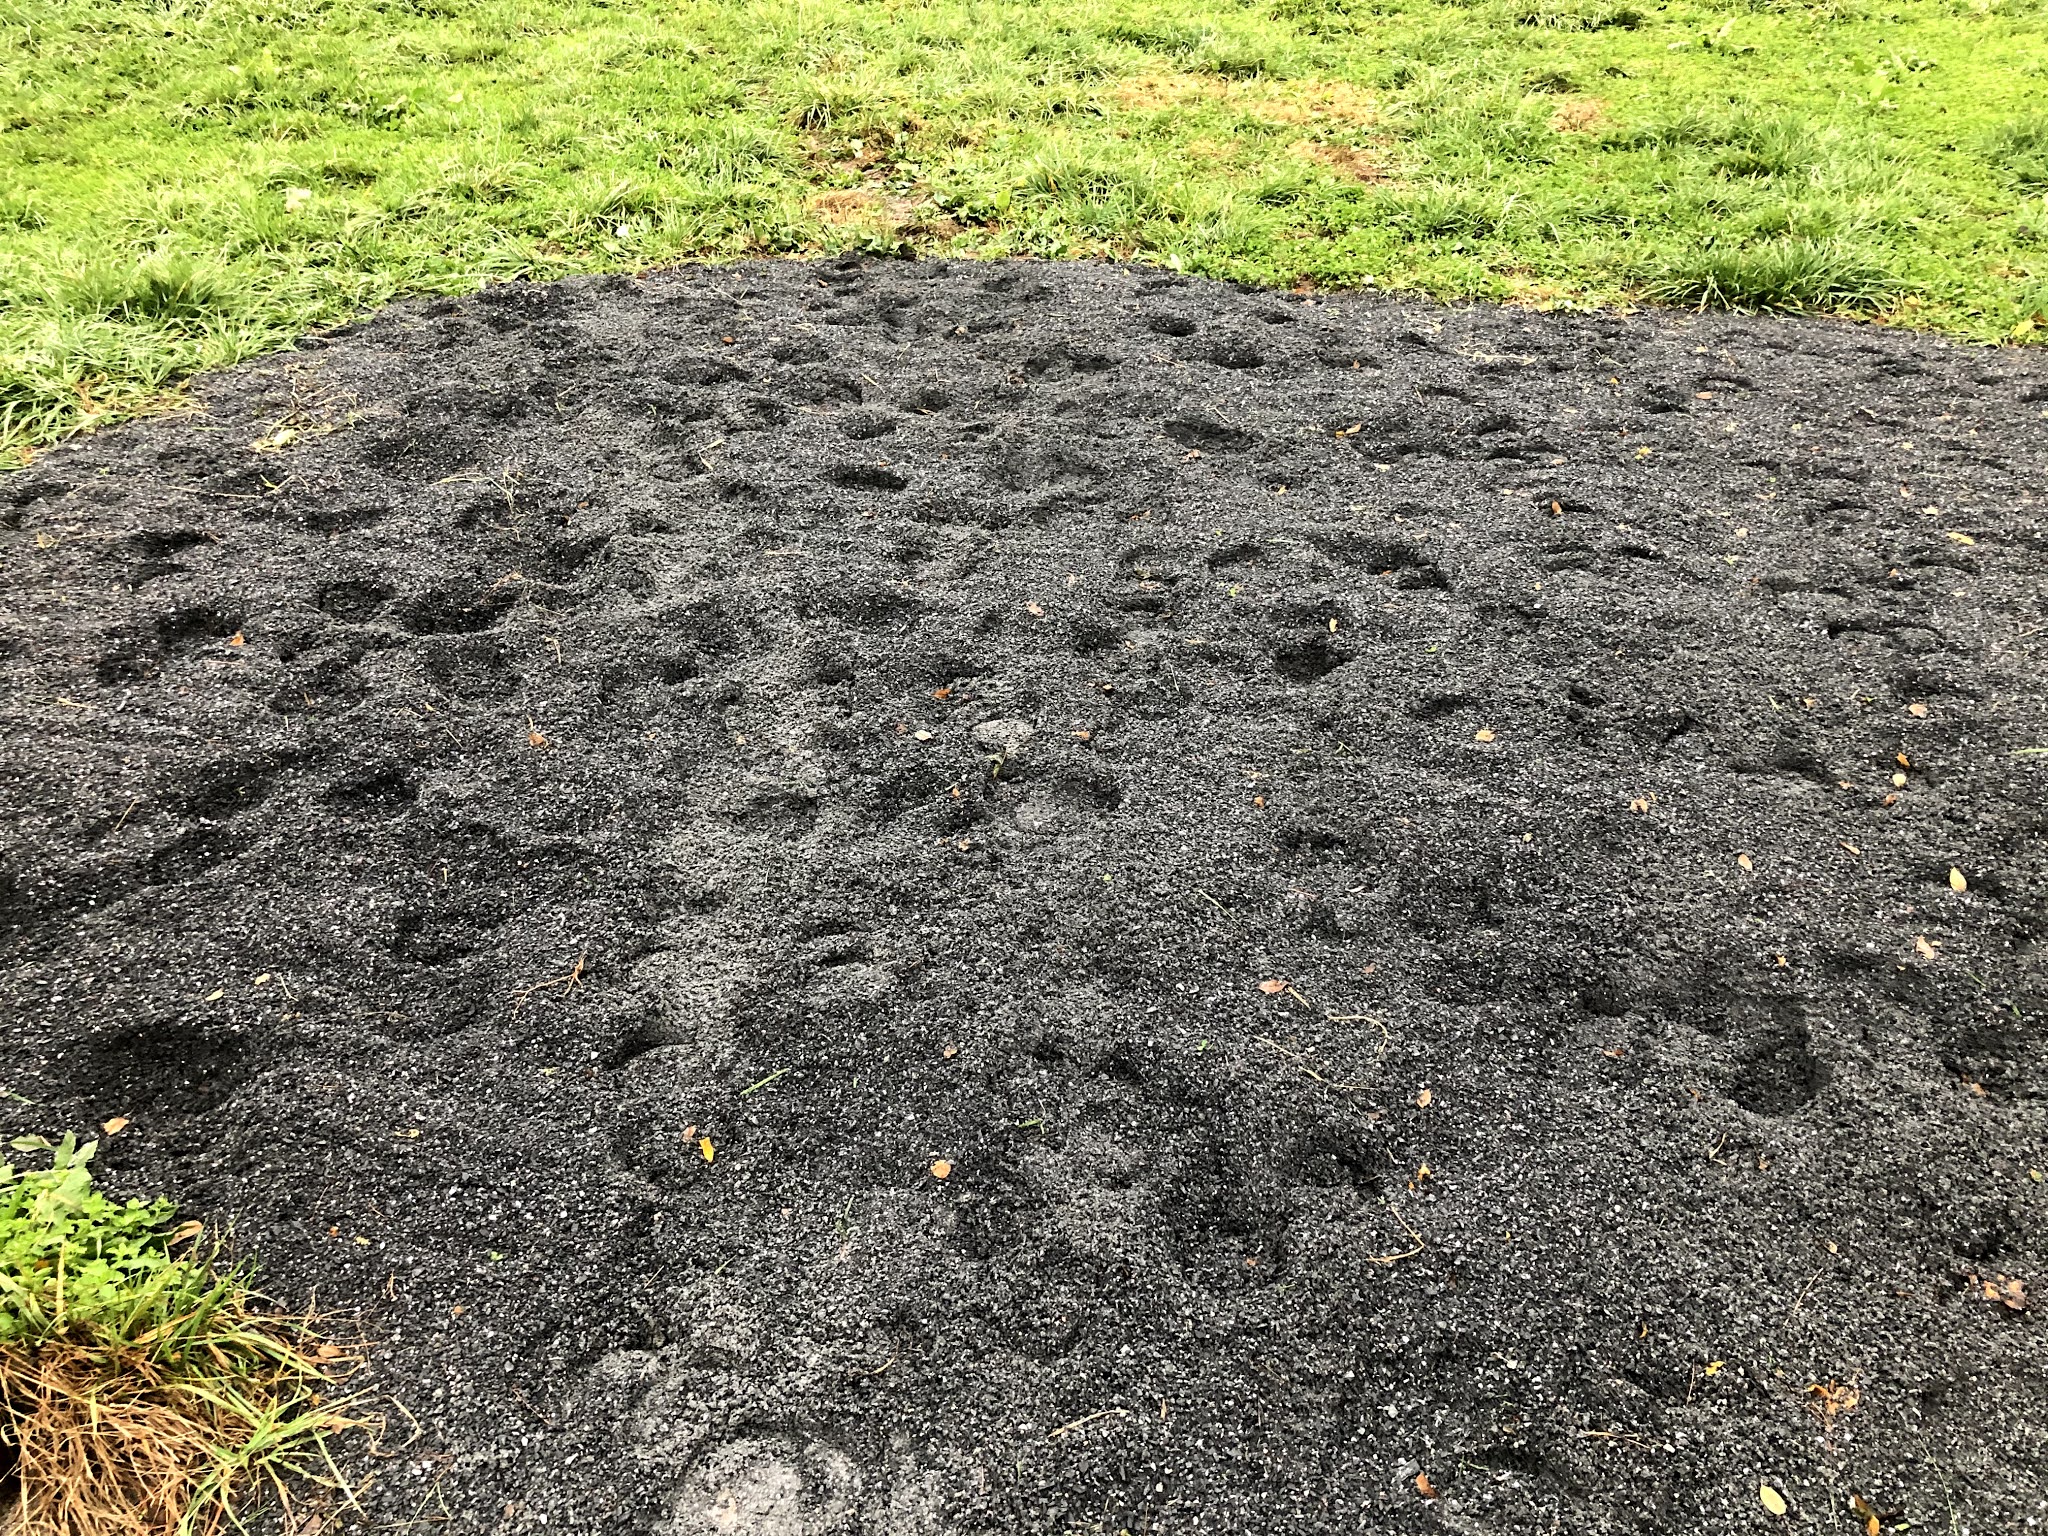
I'm excited to introduce something new to my blog: a guest post! Recently Ty and Sally Carlson posted an excellent, detailed comment on one of my previous aerated compost posts, sharing their experiences with the O2 system. They have built a pallet "floor" cleverly designed to improve aeration, and have generously allowed me to publish their comments on it here so that others can benefit. Most of this post was written by them, with my comments in italics.
Here is their comment on my previous post:
Thank you for this post. We recently bought a small horse farm and my wife heard about O2Compost from Liberty Bell stables. I grew up on a dairy farm - it's critical to have a manure plan. I liked the idea of composting, read up on the material and my wife & I agreed. We decided to build 2 bins (we have 3 horses, planning on a 4th). A local handyman built two 4d x 6w x 4h bins and built simple low-cost flap-door-type lids with 1x4s & tarps.
I was an observer up to this part of the process as I was busy with my day job and moving from one house to the farm. We encountered a couple of start-up issues. My wife mis-remembered the settings for the blower (on for 30s every 30m). She initially set it for 30s every 30s and we succeeded in melting the impeller of the blower (replacement impeller is $12.84), plus you must scrape the melted remnants off the inside of the blower. Second is that you don't start the aeration until the bin is full. It wasn't a showstopper, but I sat down and actually read through the short manual cover-cover (which is pretty good and detailed).
We had the same observations as above - we can fill a bin in about 3 weeks, depending if we pick the manure in the pasture. We use fine pine bedding, we're not tossing in a lot of bedding material unnecessarily. The pile does compress once the bin is about half-way full, we can get close to month depending on when we pick the pasture. The challenge with two bins is that we need to start the aeration of the bin and the 30 day clock while we start filling the second bin.
We had tossed yard clippings into the bin as well, and with than and a pasture pick, we almost immediately got to half-full on bin 2 in a week (ack)! We weren't going to make that month - and bin 1 would not have completed active composting stage.
I built a third bin. Our handyman started, but I wanted the bins to be identical, and this third one was a bit shorter than the others. I dug down deeper to allow the bins to be the same size/height and completed the third bin just in time as the second one filled up. Our mistake early on was adding the grass clippings and other material before understanding the volume produced by the 3 horses.
A month later, the temps in bin 1 were down to 80F-100F, we had mushrooms growing on top and now bin 3 was nearly full. One useful note is that I took the "topping" layer off the finished bin (bin 1) and put it on the now-full bin 3. We unloaded bin 1. As noted in the original post, it's "cooked" but still in very recognizable forms. It has a musty, woodsy (but not unpleasant) smell. As it was mostly horse manure with some hay and bedding (fine pine sawdust) - it was relatively easy to unload.
The aeration pipes were a bit of a pain to work around. I'm trying something in bin 1 now that's based on the other (more commercial) systems. I've built what are basically 4" mini-pallets for the base of the bins (with the main supports perpendicular to the pipes to allow air flow under the load in the bin). The ground there is a bit muddy, so I think I will have a good seal around the edges of the bin (air won't escape under it), but I'm seeing if I get better/faster composting with more of the bin material exposed to airflow. It also addresses the note above as I have it built such that I use two 1x4 boards, one each covering the two PVC pipes in the bin - so I have a nice, level surface to remove the material. I lose a bit of bin capacity, but I'm seeing if that make the overall process a bit faster - both composting as well as removal. Finally, I'm incorporating a better lid-system - like the one above. In order to provide a buffer for the fourth horse, and more time in the bins in the 'curing' phase, I'm just completing a fourth bin. I have three blowers and am using the Valterra 4" gate valves to control routing of the airflow. As we clear the bins with existing compost, I will upgrade them w/ the 'pallet' floor and the improved lid-system.
Ty and Sally generously followed that up with an email that included photos of the ingenious pallet floor they have built for their bins. I'm quite jealous because working around my aeration pipes is the worst part of emptying the bins. The email and photos are copied below:
Greetings Libby,
I was actually going to recycle old pallets, but when I went looking, there were none to be found. Now that I have purchased the wood, the co-op now has at least 20 free pallets stacked up <sigh>.
Oh well, these are treated boards, perhaps they will last longer.
The pallets themselves are just 2x4s and 1x4s, the overall interior dimension of the micro-bin is 43” x 72”. This is looking at the underside of the pallets, but you can see where the perforated pipes slot in, and the top section has an extra crossbeam which is where the perforated pipe stops – it adds a bit more support for the loose 1x4 that covers it.
This is a close-up of the left pallet section and the center pallet section before I installed them in the bin. I’ve added essentially lightening holes to make sure that air flows freely under the pallets and is not blocked by the extra crossbeams. I put 3 x 1.5” holes in each of the pallet sections.
Here’s a close-up of the right pallet section.
Here are the pallets and the micro-bin. The perforated pipes are 24” long. The pipes terminate 10” from the back of bin, that where the extra crossbeam is set (just shy of 10”). I use the Valterra 4” gate valves ($48.69 each (new) on Ebay). I want around the inside of the bin and placed muddy dirt along the bottom where it meets the ground to help create an air seal, so air doesn’t just pour out of a gap between the bin and the ground. I’ll do the same with the exterior to make sure there is a seal. Creating this lower plenum area does run the risk of the air just pouring out a gap in the structure.
Below is shown with the left and right pallets set in place. I cut the measurements by ¼” for the width of each section so there is room to place and remove them. The first section I did on the first bin I did I had a very snug fit – fine carpentry, but highly impractical. These are plenty snug, but are easy to remove. You can see where the extra crossbeam sits – just at the end of the perforated pipes – provides support for the floating 1x4s which cover the pipes.
Now all pallets in… You can see the crossbeams nearly/gently touching. The pipes are held nicely in place as well, perforations are facing downward in the 5- and 7-O’Clock positions.
And with the floating boards in place. The boards fit nicely, have fairly consistent spacing, and all of the screwheads etc. are slightly recessed so shovels or loaders won’t get hung up on raised screwheads. The front of the bin are 8 2x6s and one 2x9 at the top (in the front) to create a pitched roof for the water to run off the back. I’m building the roof sections probably tomorrow – I like what you did with the supports and the line to open the doors. I’m planning on doing something similar.
I'm super impressed with this concept, and how lovely the Carlson's bins are. They have just started filling their first pallet-floor bin, and I am curious to hear in a few months how the floor affects the quality of the compost. Ty and Sally, please keep us updated!
You can read more about my experiences with the aerated compost system here:
Bin Construction
The Composting Process
Spreading
Is It Right For You?
3-Years of Composting (coming soon!)
Tuesday, April 28, 2020
Tuesday, April 14, 2020
Jump Pole Storage
I finally bought jump standards and poles last summer, and since then the poles have been sitting in a stack in the corner of the arena. It was unsightly and annoying, and prevented me from riding deeply into that one corner. It's also not great for the poles to sit on the damp ground.
Recently I decided to get off my butt and do something with them. This was another thing I'd been putting off because I wasn't sure of the best way to do it (which reminds me of the adage that the best is the enemy of the good). I've seen other people use ladder hooks, hose hangers, and other random things that aren't sturdy enough and eventually bend or break. You can see in the picture below that the lower-left ladder hook that I've used for only four trot poles (two on each pair of hooks) has bent, which made me not want to go that route again.
I considered making wooden brackets but instead I decided to buy the Bora Portamate Wood Organizer. I am quite impressed with how sturdy it is, especially for only $39, and it was also very easy to install. I mounted it on a section of the fence next to the arena by adding two spare fence boards horizontally (because the existing boards are too old and weathered to be trusted with much weight) and two 2x4s vertically.
| Unsightly pile of jump poles (actually 8' landscape timbers because they're inexpensive, have rounded edges, and are the perfect length for a narrow arena). |
I considered making wooden brackets but instead I decided to buy the Bora Portamate Wood Organizer. I am quite impressed with how sturdy it is, especially for only $39, and it was also very easy to install. I mounted it on a section of the fence next to the arena by adding two spare fence boards horizontally (because the existing boards are too old and weathered to be trusted with much weight) and two 2x4s vertically.
| Here you can see the horizontal and vertical supports. The fence is on a slope so I made sure to use a level! |
| The organizer is advertised to hold 600 lb so it should easily support my 15 jump poles, or even more if I need them. |
| The old ladder racks should do for hanging this gate. |
Sunday, April 12, 2020
Turns Out Two Donkeys are More Than Twice the Work
If there is a theme to this blog, it is the law of unintended consequences. By which I mean, every "improvement" I've made has presented new problems to solve. Acquiring a second donkey, which I wrote about in this post, has proven to be no exception. I've already encountered a few issues:
1) Donkey messes
One great thing about Dominick, my original donkey, is that he's quite tidy. He likes to poop mostly in one pile (a side-effect of his late gelding, I believe) and doesn't step in it on purpose. It's funny how when you start keeping your horses at home their stall habits and cleanliness suddenly go from something you never really thought about to a top priority and source of frustration.
On the other hand, my new donkey Lancelot's favorite pooping spot is "while walking." To make matters worse, the donkeys have several adorable-but-messy play sessions each day, during which they trample their manure, grind it into tiny pieces, and scatter it in all directions.
After a few weeks of cleaning shards of donkey poo out of all my expensive stonedust twice a day, I decided to move the donkeys into their own area that I wouldn't have to pick daily. Sorry donkeys, you've lost privileges!
I thought about fencing a whole new area for the donkeys, either beside the barn or in an open area near the pasture. Those spots would keep them near the horses to provide companionship and would have easy access to water and electricity. However, neither of those spots seemed large enough or flat enough, plus I wasn't sure I wanted to commit to spending money on new wood fencing yet.
To test the donkey paddock plan, I decided on the easiest and lowest-cost option: to use Horseguard electric fence to create a corridor in the pasture between the dry lot and the old run-in shed, an area of about 225'x25'. The donkeys now have shelter as well as plenty of room to run and play. It didn't require any permanent changes and I had already most of the materials I needed for the fence, which they respect very well. The one catch is that they don't have access to the Nelson waterer, and there's no nearby spigot or electricity, so when winter comes I'll have to figure out how to deal with providing water.
Twice a day I hang a fresh hay net on the wood fence. Underneath and in front of the hay net I placed some spare rubber mats to mitigate mud. Now the rubber mats and the shed are the only places I need to pick manure, and I don't feel like I have to clean every shard like I did with the stonedust. Every week or so I drag the rest of the paddock to break up the manure. They tend to poo along the path that they've already worn between the shed and the hay, so the grass along the exterior fence remains uncontaminated and good for nibbling.
It's a small enough area that Dominick no longer has to wear a grazing muzzle, which is good because Lance likes to use it as a handle. Which actually brings me to issue #2...
2) Donkey roughhousing
All of a sudden, after almost three months of peaceful coexistence, Dom started biting Lance's neck and throat hard enough to draw blood. Lance returned the favor, not quite as badly, on Dom's crest. I don't know why they were suddenly at each other's throats (literally) but the vet who runs the donkey rescue said it could be spring-hormone-related even though they're both geldings. I was able to observe them a few times and it mostly looked like mutual play. Although Lance didn't look super enthusiastic when Dom latched onto the side of his neck, as soon as they split up he'd come back for more.
I couldn't muzzle Dom because Lance would just use the halter/muzzle to drag Dom around, and I couldn't muzzle both of them because Lance is still scared of everything and would probably have a donkey heart attack.
1) Donkey messes
One great thing about Dominick, my original donkey, is that he's quite tidy. He likes to poop mostly in one pile (a side-effect of his late gelding, I believe) and doesn't step in it on purpose. It's funny how when you start keeping your horses at home their stall habits and cleanliness suddenly go from something you never really thought about to a top priority and source of frustration.
On the other hand, my new donkey Lancelot's favorite pooping spot is "while walking." To make matters worse, the donkeys have several adorable-but-messy play sessions each day, during which they trample their manure, grind it into tiny pieces, and scatter it in all directions.
After a few weeks of cleaning shards of donkey poo out of all my expensive stonedust twice a day, I decided to move the donkeys into their own area that I wouldn't have to pick daily. Sorry donkeys, you've lost privileges!
I thought about fencing a whole new area for the donkeys, either beside the barn or in an open area near the pasture. Those spots would keep them near the horses to provide companionship and would have easy access to water and electricity. However, neither of those spots seemed large enough or flat enough, plus I wasn't sure I wanted to commit to spending money on new wood fencing yet.
To test the donkey paddock plan, I decided on the easiest and lowest-cost option: to use Horseguard electric fence to create a corridor in the pasture between the dry lot and the old run-in shed, an area of about 225'x25'. The donkeys now have shelter as well as plenty of room to run and play. It didn't require any permanent changes and I had already most of the materials I needed for the fence, which they respect very well. The one catch is that they don't have access to the Nelson waterer, and there's no nearby spigot or electricity, so when winter comes I'll have to figure out how to deal with providing water.
Twice a day I hang a fresh hay net on the wood fence. Underneath and in front of the hay net I placed some spare rubber mats to mitigate mud. Now the rubber mats and the shed are the only places I need to pick manure, and I don't feel like I have to clean every shard like I did with the stonedust. Every week or so I drag the rest of the paddock to break up the manure. They tend to poo along the path that they've already worn between the shed and the hay, so the grass along the exterior fence remains uncontaminated and good for nibbling.
It's a small enough area that Dominick no longer has to wear a grazing muzzle, which is good because Lance likes to use it as a handle. Which actually brings me to issue #2...
2) Donkey roughhousing
All of a sudden, after almost three months of peaceful coexistence, Dom started biting Lance's neck and throat hard enough to draw blood. Lance returned the favor, not quite as badly, on Dom's crest. I don't know why they were suddenly at each other's throats (literally) but the vet who runs the donkey rescue said it could be spring-hormone-related even though they're both geldings. I was able to observe them a few times and it mostly looked like mutual play. Although Lance didn't look super enthusiastic when Dom latched onto the side of his neck, as soon as they split up he'd come back for more.
| The battle of the majestic mighty stallions. |
| They look soooooooo innocent... |
Friday, April 10, 2020
My Winter of Living Lazily a.k.a. An Experiment with 24/7 Turnout in Winter
So if you've read a few of my blog posts you may have noticed that over the last six years of farm management, my horsekeeping practices have evolved. When I first built the place I modeled my care on my favorite boarding barns, where my horses had been stalled during the day in the summer and overnight in the winter. My stalls were simple 12x12 stalls with Dutch doors to the outside. This was how my horses had always lived and they'd been fine with it and so had I, so that's what I did. I also thought that two large horses would demolish my three acres of pasture if I left them out 24/7.
Within the first year I added a small 30'x45' corral behind the barn so I could leave the Dutch doors open and give the horses in/out access to individual runs. This was better for the horses because they weren't trapped in little boxes 8-16 hours a day, and it was better for me because the horses sometimes pooped in the runs and weren't milling around in their stalls making them messier and harder to clean. Sometimes in the winter between dinner and night check I would lock them out of their stalls if the weather was good, to minimize stall cleaning even more.
Two years later I took another big step and built my wonderful dry lot, so that I could transition the horses away from stalling. I still thought they would overgraze and destroy the pasture on full turnout, so the dry lot was necessary to rest the pasture. For several years my horses lived in the dry lot all winter and I opened a gate to the highest and driest acre for about eight hours every day as long as the ground wasn't too wet. My chore time was drastically cut down compared to overnight stalling because I no longer did night check and I only had to skim manure off the stonedust daily rather than sifting through bedding and cleaning urine spots. One winter when I had two horses that didn't need blankets or much grain, I started feeding them grain only in the afternoons (in feed bags, in the dry lot) so that my morning chores were reduced to going outside in my work clothes and opening a gate! Have I mentioned how much I love my dry lot??
Well, this past winter my "efficiency" (okay fine, laziness) rose to new levels... I decided to see what would happen if I let my two horses have full access to my top acre for the whole winter. (Partially this was due to a desire to cut down on chores, and partially it was because I have a new Thoroughbred who acts like he's starting the Kentucky Derby every time you open a gate. He's not rude but he does like to gallop around and buck, and I was worried about him slipping and getting hurt. If the gate just stays open all the time, there's no novelty and no moment of, "Woo hoo, I'm free!" excitement.) Every spring my fields grow more grass than the horses know what to do with, so I was hoping the top acre would survive the additional wear and tear.
Spring is here and I can now say that my experiment was a great success! The horses were happy to come and go as they pleased, nobody ran the Kentucky Derby every morning, I didn't have to clean quite as much manure because they spent more time out in the pasture, and the field survived very well. I know I got lucky because we had a short, mild winter, but according to NOAA we did get average precipitation (no real snow though!). Here's what the top acre of pasture has looked like over the past few months:
my failed attempt at round bales this year reducing January's square bale count somewhat; 2) my new 1,200-lb Thoroughbred replacing the 1,600-lb Hanoverian (no exaggeration, this weight is from a scale at the clinic!) that I had in 2017; and 3) Dominick the Donkey not being included in the 2020 consumption because he has moved into a separate paddock with his new buddy Lancelot.
So far I'm still allowing the horses 24/7 access to grass (on an acre that has rested all winter) and it's interesting to observe how they spend their time while I've been working from home due to the COVID-19 pandemic. Even though the grass is amazing right now and they do graze a lot, they spend plenty of time just standing under a tree hanging out, lying down napping in the sun, and even munching on the hay that I continue to provide (though at a much lower rate of half a bale every few days or whenever they clean it up). This somewhat allays my fears about them overindulging on the rich spring grass.
Speaking of overindulgence, here is what the research shows about horses' grazing patterns:
"It is estimated that a horse spends about 10 to 17 hours each day grazing, and this is broken up into about 15 to 20 grazing periods." (https://ker.com/equinews/grazing-behavior-horses/) This suggests that 24/7 turnout might not actually result in much more grazing time than overnight 16-hour turnout.
"At varying levels of pasture turnout, an 1100 lb (500 kg) horse will consume the following amounts of grass dry matter (all horses were given free choice hay when removed from pasture):
The less time you allow for pasture grazing, the more excited your horse will be at the opportunity to have fresh grass and he will eat nearly three times faster than if he had access to pasture 24/7." (https://www.horsejournals.com/horses-graze-pasture-247-eat-more-slowly)
I'm hoping that knowing the grass is always there the horses will self-regulate appropriately, and so far it seems to be working. My plan is to leave them out 24/7 until the heat and flies get bad, and then switch to my normal summer schedule of stalling them during the day (with access to the corral) and turning them out at night. Then when it cools off in the fall I'll turn them back out and enjoy not cleaning stalls for another 7-8 months!
All in all, I'm quite pleased with how the winter went and will probably try the same thing again next year, although I'm sure I won't get so lucky with such mild temperatures two years in a row. If you're curious, this is what NOAA has to say about temperature and precipitation between October 2019 and March 2020, compared to averages:
Within the first year I added a small 30'x45' corral behind the barn so I could leave the Dutch doors open and give the horses in/out access to individual runs. This was better for the horses because they weren't trapped in little boxes 8-16 hours a day, and it was better for me because the horses sometimes pooped in the runs and weren't milling around in their stalls making them messier and harder to clean. Sometimes in the winter between dinner and night check I would lock them out of their stalls if the weather was good, to minimize stall cleaning even more.
| Mr. F and Dominick the Donkey enjoy their newfound in/out freedom. |
Well, this past winter my "efficiency" (okay fine, laziness) rose to new levels... I decided to see what would happen if I let my two horses have full access to my top acre for the whole winter. (Partially this was due to a desire to cut down on chores, and partially it was because I have a new Thoroughbred who acts like he's starting the Kentucky Derby every time you open a gate. He's not rude but he does like to gallop around and buck, and I was worried about him slipping and getting hurt. If the gate just stays open all the time, there's no novelty and no moment of, "Woo hoo, I'm free!" excitement.) Every spring my fields grow more grass than the horses know what to do with, so I was hoping the top acre would survive the additional wear and tear.
Spring is here and I can now say that my experiment was a great success! The horses were happy to come and go as they pleased, nobody ran the Kentucky Derby every morning, I didn't have to clean quite as much manure because they spent more time out in the pasture, and the field survived very well. I know I got lucky because we had a short, mild winter, but according to NOAA we did get average precipitation (no real snow though!). Here's what the top acre of pasture has looked like over the past few months:
| March 10th: Spring is almost here and the bare spot around the gate has stayed about the same size, though it's dry and firm now. The rest of the field is eaten down but not very torn up. |
| March 27th: Wow, what a difference 17 days makes this time of year! The grass has turned green and overall I think this acre looks pretty good considering how much use it got all winter. |
my failed attempt at round bales this year reducing January's square bale count somewhat; 2) my new 1,200-lb Thoroughbred replacing the 1,600-lb Hanoverian (no exaggeration, this weight is from a scale at the clinic!) that I had in 2017; and 3) Dominick the Donkey not being included in the 2020 consumption because he has moved into a separate paddock with his new buddy Lancelot.
So far I'm still allowing the horses 24/7 access to grass (on an acre that has rested all winter) and it's interesting to observe how they spend their time while I've been working from home due to the COVID-19 pandemic. Even though the grass is amazing right now and they do graze a lot, they spend plenty of time just standing under a tree hanging out, lying down napping in the sun, and even munching on the hay that I continue to provide (though at a much lower rate of half a bale every few days or whenever they clean it up). This somewhat allays my fears about them overindulging on the rich spring grass.
| April 5th: the boys take a break from the spring grass to relax in the sun. |
"It is estimated that a horse spends about 10 to 17 hours each day grazing, and this is broken up into about 15 to 20 grazing periods." (https://ker.com/equinews/grazing-behavior-horses/) This suggests that 24/7 turnout might not actually result in much more grazing time than overnight 16-hour turnout.
"At varying levels of pasture turnout, an 1100 lb (500 kg) horse will consume the following amounts of grass dry matter (all horses were given free choice hay when removed from pasture):
- 24 hours/day: 0.77 lb per hour (0.35 kg/hr)
- 9 hours/day: 1.32 lb/hr (0.6 kg/hr)
- 6 hours/day: 1.65 lb/hr (0.75 kg/hr)
- 3 hours/day: 2.2 lb/hr (1.0 kg/hr)
The less time you allow for pasture grazing, the more excited your horse will be at the opportunity to have fresh grass and he will eat nearly three times faster than if he had access to pasture 24/7." (https://www.horsejournals.com/horses-graze-pasture-247-eat-more-slowly)
I'm hoping that knowing the grass is always there the horses will self-regulate appropriately, and so far it seems to be working. My plan is to leave them out 24/7 until the heat and flies get bad, and then switch to my normal summer schedule of stalling them during the day (with access to the corral) and turning them out at night. Then when it cools off in the fall I'll turn them back out and enjoy not cleaning stalls for another 7-8 months!
All in all, I'm quite pleased with how the winter went and will probably try the same thing again next year, although I'm sure I won't get so lucky with such mild temperatures two years in a row. If you're curious, this is what NOAA has to say about temperature and precipitation between October 2019 and March 2020, compared to averages:
January 2021 update: In September when the ground was nice and firm, I added a stonedust pad to the gate area of my "winter paddock" to mitigate the winter mud situation. I used my compact tractor to remove a rectangle of grass and topsoil (not at all evenly or professionally, and probably deeper than necessary, but oh well) and then filled it in with stonedust. It took about three-quarters of a 22-ton load of stonedust. Here are some photos of the process:
| I tried to excavate out to where at least most of the mud accumulated last winter. |
| That's a pretty big pile of stone! |
| I gave the new stonedust weeks to get rained on and settle, but when I first turned the horses out in that field they still left very, very deep hoof prints. |
Wednesday, January 29, 2020
The Viability of the "Project Horse"
One idea you may have is to take on a project horse, something you will buy, train up, and sell--hopefully at a profit. The recipe for success with a project horse is complex:
- One sound, sane horse with potential for success in your discipline, acquired for a reasonable price (bonus points if said horse is flashy, but at the very least it should be a desirable breed, size, sex, and color)
- Minimal-cost horse care/board (here is where it is crucial to have your own farm because it's much less feasible to profit on a project if you're paying $500-1000+ for board per month)
- Regular doses of skilled riding and training (with support from trainers as needed)
- Required registrations and competition entry fees, and success at those competitions
- Good luck so that horse will remain sound, sane, and marketable
The Project Pony
I bought Gwen in July of 2018. Here's another tip: if you buy a resale project, you're off to a good start if it's totally adorable! Just look at this cute face and big poofy forelock:
| Gwen meets Dominick the Donkey for the first time, in a showdown of adorableness. |
Gwen was a green-ish 7-year-old who had been through a couple of owners and was currently at a very small lesson barn where she wasn't quite suitable to the beginner clientele due to her forwardness and sensitivity. As far as I could tell when I first bought her, her pros as a project were:
- Adorable (see photo for proof)
- Well-kept and apparently healthy
- Not too old
- Clean legs, eyes, etc
- Good feet
- Decent gaits
- Described as pretty unflappable (this turned out to be true)
- Game to jump (very true!)
- No apparent vices (also true)
- Registerable with a breed association
- Plain bay mare
- Too small for most adults
- Too forward/sensitive for many kids
- Some holes in her training (rushy canter, no concept of correct contact)
When I bought Gwen in July I planned to sell her within 3 to 9 months. I charted out expected monthly expenses, added in a buffer for unexpected extras, and calculated the price I'd need to sell her for to break even at 3 or 9 months. (I deleted that document a while ago but remember it not being terribly far off reality as far as monthly and occasional expenses.)
The first thing I discovered was that three months was wildly unrealistic. She hadn't been in consistent work when I bought her so I conservatively spent about a month legging her up to avoid injuries. It was a good way to get to know each other too. We spent most of that month on the trails, first just walking and then as the weeks passed adding in trot and canter. She proved to be a phenomenal trail horse--brave, confident without other horses, and very surefooted. My young horse was lame at that time with an uncertain future, and riding Gwen through the woods and fields was very therapeutic.
| Nothing soothes the soul like a view of nature through a good horse's ears. |
At the end of three months, we had just done our first horse trial (starter/elementary-level). She tied for first in dressage and jumped double clear despite some nasty weather and slick footing. I was thrilled with her performance and with how much fun I'd had. That was probably about the time I realized I wasn't selling her before winter, and resigned myself to buying some pony-sized blankets.
In month five we did our first Beginner Novice horse trial (still unrecognized) and she was just as fabulous. We spent the winter dabbling in foxhunting (not her strength...she got uncharacteristically wired) and working on our dressage and jumping.
| Pony's got springs! In a demonstration of her scope, 13.2 hh Gwen easily clears a 3'3" oxer during a winter lesson. |
At the end of month eleven I put her on the market and she was sold within two weeks. I still miss her but am thrilled with the home she found, with a smaller adult amateur who is a better size for her and spoils "the princess" rotten.
The Project Profitability
Although I kept her for longer than expected, I recognize that I got pretty damn lucky with this project all-around. She was super easy to add to my menagerie because she was happy to live outside alone when needed but also got along when turned out with others. She wasn't "mare-ish" at all. She didn't turn out to be chronically unsound or nutty. She didn't have any devastating injuries. I found a buyer pretty quickly once I decided to sell.
And yet, I still didn't make any money. Let me break it down for you. As you may have learned already, I'm kind of a spreadsheet person so naturally I tracked every single expense related to the pony in an Excel document. I didn't factor in my time/labor or any general property-related expenses since she was an "add-on" to my existing herd.
Here is a summary of my expenses:
Pony purchase: $1,600
One year of "board": $598 (yes, you read that right...less than $50/month for grain, hay, and bedding)
Trims/shoeing: $740 (she was barefoot until shortly before I sold her)
Vet/dentist/meds: $2,439 (about $1,000 routine and $1,500 to resolve a specific issue)
Equipment (saddle fitting, pony-sized girth, fly mask, blankets, etc): $690 but I sold some of it with her for $320, so net of $370
Factoring in only the above expenses, I pretty much broke even when I sold her after a year.
However, I spent about $2,200 on shows, foxhunting, and clinics. Obviously those were fun and educational for me but the shows were also required to justify her sales price, which was a good amount above the $1,600 I had spent on the good-natured but green pony.
I also spent about $2k in dressage and jumping lessons during that time. Again, those were partially for my education and enjoyment, but I would not have created as much value in the pony without them. I could have brought her along fairly well on the flat because I have a strong dressage background, but I was getting back into jumping after some time off and both the pony and I really benefited from the jumping lessons.
In the end, I decided it was fair to apportion half of the shows, clinics, lessons, etc to the pony's development costs and half to myself because I was benefiting too. Adding up all the expenses I mentioned above plus half of those costs, I lost about $2,500 on my project pony. I don't regret it at all because I think $2,500 is a small price to pay for a year of fun with a freakin adorable pony, but it's certainly not a good business model. Good thing I'm not in horses for the money!
I can't say I won't ever do the project horse thing again, but I do worry that I wouldn't get so lucky twice. I would also be careful to start with one that I think will be easy and low-maintenance like Gwen, but you really never know what you've got until you bring a new horse home and work with it for a bit.
Just some food for thought if you find yourself wondering whether you can fill that extra stall with a money maker!
Friday, January 17, 2020
Winter Hay Feeding: Round Bales vs. Small Square Bales
![]() |
| Turns out it's not always this easy... |
The major pros of round bales are the daily labor savings and the cost. It's so much easier to put out a round bale every few weeks than it is to dole out square bales daily, whether I'm putting them in hanging hay nets or hay boxes or just throwing them into the Hay Hut (the easiest option for square bales by far, though the horses do pull some of it out onto the ground).
| I also used to hang hay in nets on the fence in the dry lot. Here Dominick the Donkey demonstrates that a little no-climb wire can't keep him from food! |
I have also definitely saved some money feeding round bales. Here were my average hay costs per horse per month from December to February by year (the horse count doesn't include the mini-donkey because he eats relatively little and has been a constant--sorry Dominick!):
2014-2015: $101/horse/month (small squares...I don't think I fed the best hay this first year, out of ignorance, which is part of why costs were so low)
2015-2016: $156/horse/month (small squares)
2016-2017: $157/horse/month (small squares)
2017-2018: $152/horse/month (small squares)
2018-2019: $94/horse/mo (round bales supplemented with 4-12 small squares per month)
Dec 2019: $59/horse/mo (round bales supplemented with 6 small squares)
The cost savings look great, but unfortunately some of my horses haven't maintained weight well on round bales and a lot of each bale goes to waste. They're just not that enthusiastic about them and they seem willing to starve themselves to some extent. Some people say, "If they get hungry enough they'll eat them," but I'm not willing to let my horses lose weight and condition just to save myself some work and money.
| One of my Thoroughbreds four days before I put out the first roundbale of the season. |
| The same horse, noticeably thinner after being on a roundbale for a month. Interestingly, this weight loss was despite dramatically increasing his grain from ration balancer plus 2 lbs/day of rice bran to 7 lbs/day of Triple Crown Senior. It wasn't a very cold month either. And he was out of work for a couple weeks so he should have needed fewer calories! |
![]() |
| Update 1/24: After less than 2 weeks back on square bales, the Thoroughbred's ribs are already less visible. His workload and grain ration stayed the same. |
I think the waste and weight loss are caused by a combination of two factors:
1) Horses seem to believe that hay has an "expiration date" once set out, even if it's protected from the weather. If you have more horses they will eat the round bale fast enough that it doesn't reach the expiration date (and hopefully some are on the less picky end of the spectrum and willing to clean up what the princes and princesses won't touch). With only two to three horses, I've found that a lot of each bale gets left behind and goes to waste.
2) Round bale palatability, in my experience, is lower than square bales. They seem to eat 80-100% of most square bales but only about 60% of round bales. (Some of the ~40% they don't eat has probably reached its "expiration date" but I also think some of it was unpalatable to begin with. Even from the beginning of a new bale there are mouthfuls that they will taste then let fall out of their mouths, or move out of the way to get to the choicer parts.)
Usually after two weeks it's hard to tell if the hay level is going down at all. I untie the hay net so they can pick through it more easily, but that hasn't done the trick. The longest I've left one out was a month, and at that point they weren't eating it at all. After two weeks or so I'm typically wondering if they're eating enough and worrying about them losing weight. My horses will eat about 30 lbs/day each of square bales, so a 600-lb round bale should only last about 10 days with 2 horses if they're eating at the same rate. The fact that a round bale lasts me weeks and weeks means that a) they're just not that into it and b) they're not getting the nutrition they need.
| Giant pile of uneaten hay that needs to be moved before I can place the new bale (which, by the way, is easier to unload if it's turned 90 degrees so you can roll it off the tailgate). |
| I ended up dragging the pile of hay out to the field to decompose, which is probably more stress than I should put on my round bale net regularly. |
Thursday, January 9, 2020
If One Donkey Is Good, Two Are Better!
Dominick the Donkey has been part of my herd pretty much since I brought my horses home, in August 2014. I found him on Craigslist and brought him home from an unsanitary horse dealer's lot where he was living in a large concrete pen with a couple dozen other equines, picking straw and hay out of muck piles. :-( Amazingly, despite coming from a bad setting, he had obviously been well cared for in the past because he was in good weight and had healthy, well-managed feet.
For 5.5 years, Dominick has enjoyed being one of the gang with the horses. Unfortunately, horses and donkeys (especially miniatures like Dom) have very different nutritional requirements. My large, hard-working horses do best with free-choice forage, whereas Dom needs his intake limited. In the summer this is easy because the gang comes into the barn for the day to avoid the heat and bugs, where each stall/run is stocked with the right amount of hay for its occupant (full hay nets for the horses, and a single flake for Dom). Overnight while they're turned out on grass, Dom wears a grazing muzzle.
Winter has been a bigger challenge because full-time turnout with unlimited hay is easiest for me and healthiest for them, but makes it difficult to manage Dom's weight. He tolerates a muzzle 24/7 but I hate that he doesn't get a break from it, and even with the muzzle he tends to come out of winter fatter than he went in. I can't separate him from his horse friends to give him a break from the muzzle either because he will freak out alone, even if they're still in sight.
So, I finally decided to cave and acquire a buddy for Dom, so that he can be dry-lotted with a friend and appropriate forage while the horses are turned out 24/7. Which leads me to...
Welcome home, Lancelot!!!!
Lance came from a wonderful Maryland rescue, Lost and Found Horse Rescue, which despite its name rescues primarily donkeys. He is about two years old and was born to a feral herd, so although Ashley at LFHR has done a terrific job getting him healthy, he is still very timid around people and easily frightened. Thankfully he is also highly food-motivated so every evening I hold a bucket with some Triple Crown Senior and while he eats I scratch and groom him. We're also working on giving to pressure and leading properly, because right now leading involves me luring him from one place to another with a bucket of grain. Thank goodness he loves his food!
After only a couple of days together, Dom and Lance are sharing a stall and a hay net. I think they will be inseparable before long! I also think Dom will be a good influence as Lance is already getting braver around me while he watches Dom approach fearlessly for treats and attention. I love that Dom will have a friend his size to play with because he clearly enjoyed playing with my yearling a few years back, but hasn't had anyone who will play with him since.
What I've learned from this is that although donkeys are wonderful, they are not ideal companions for horses unless you can limit grass/hay or separate them at least part of the time. When I first got Dom I was stalling my horses during the day in summer and overnight in winter, which worked well for him, but as my horse management practices have evolved I've had to adjust my donkey management too. I hope that having a buddy brings Dom joy and helps keep him healthy for years to come.
For 5.5 years, Dominick has enjoyed being one of the gang with the horses. Unfortunately, horses and donkeys (especially miniatures like Dom) have very different nutritional requirements. My large, hard-working horses do best with free-choice forage, whereas Dom needs his intake limited. In the summer this is easy because the gang comes into the barn for the day to avoid the heat and bugs, where each stall/run is stocked with the right amount of hay for its occupant (full hay nets for the horses, and a single flake for Dom). Overnight while they're turned out on grass, Dom wears a grazing muzzle.
Winter has been a bigger challenge because full-time turnout with unlimited hay is easiest for me and healthiest for them, but makes it difficult to manage Dom's weight. He tolerates a muzzle 24/7 but I hate that he doesn't get a break from it, and even with the muzzle he tends to come out of winter fatter than he went in. I can't separate him from his horse friends to give him a break from the muzzle either because he will freak out alone, even if they're still in sight.
So, I finally decided to cave and acquire a buddy for Dom, so that he can be dry-lotted with a friend and appropriate forage while the horses are turned out 24/7. Which leads me to...
Welcome home, Lancelot!!!!
| Mr. F says, "Mom, I don't know if you realize but there's a small gray thing in my stall..." |
After only a couple of days together, Dom and Lance are sharing a stall and a hay net. I think they will be inseparable before long! I also think Dom will be a good influence as Lance is already getting braver around me while he watches Dom approach fearlessly for treats and attention. I love that Dom will have a friend his size to play with because he clearly enjoyed playing with my yearling a few years back, but hasn't had anyone who will play with him since.
What I've learned from this is that although donkeys are wonderful, they are not ideal companions for horses unless you can limit grass/hay or separate them at least part of the time. When I first got Dom I was stalling my horses during the day in summer and overnight in winter, which worked well for him, but as my horse management practices have evolved I've had to adjust my donkey management too. I hope that having a buddy brings Dom joy and helps keep him healthy for years to come.
Saturday, September 14, 2019
Cleaning Saddle Pads
Confession: I suck at keeping horse gear clean. At shows I tend to hope that most people will be focused on their own business, and any dirt or stains noticed in the show ring will be attributed to the warm-up. I always manage to bump against some dirty, greasy part of the truck or trailer while wearing my white breeches. I tend to just buy cheap white show pads and breeches so I don't feel so bad when I ruin them.
But as a generally neat and tidy person, I don't want to be that slob. So, I've recently been experimenting with some different methods of cleaning saddle pads and here's what I've learned.
An ounce of prevention is worth a pound of cure
Okay, this one thing makes a huge difference! After each hot summer ride, turn the hose on full-blast, hang the saddle pad upside down on a fence, and spray the dirt and sweat off the underside of the pad before it dries and hardens. I also use a Strip Hair groomer to flick off the hair. Leave the pad out to dry in the sun. It should be soft and relatively clean in a few hours. If you add this to your daily routine, your pads will stay cleaner and go longer between real washes.
For a deep clean, try a pressure washer
If you have a farm, odds are you have a pressure washer. If not, you should! They're incredibly useful for cleaning pretty much everything...trailers, buildings, concrete floors, horse brushes, you name it. (Not the horses though!) I recently broke mine out and sprayed off all my saddle pads with just water. For some of the pads, I found the results almost miraculous.
Look at this Euro Eventer pad! I washed half of the underside and was so amazed at the results that obviously I had to take a picture. The crazy thing is that I don't use this pad often at all, so the dirt was old and well set. It had also already been washed in the machine. This is not fresh dirt coming off. Amazing!
I tried both the 40-degree and 25-degree nozzles. The 25-degree one was probably a little much and I did notice damage to some of the cheaper pads afterwards. If you go this route, be careful, start with lower pressure, and test it on your older or less-expensive pads first.
I soaked a few pads in Oxy Clean for a couple of hours before pressure washing and didn't really notice a difference between those pads and the others.
For tough stains, try Fels Naptha soap
You know those dark boot stains right behind the girth? Try pre-treating them with a bar of Fels Naptha soap. The old boot stains I treated with it didn't come out completely, but I was surprised how much things improved. I can't wait to try it on a fresher stain!
One pad from beginning to end
I don't feel like I've mastered this because that white show pad is still not sparkling clean. How do people do that? Other things I'd like to try are spraying new pads with Scotch Guard before use and washing show pads immediately after the show (duh).
But as a generally neat and tidy person, I don't want to be that slob. So, I've recently been experimenting with some different methods of cleaning saddle pads and here's what I've learned.
An ounce of prevention is worth a pound of cure
Okay, this one thing makes a huge difference! After each hot summer ride, turn the hose on full-blast, hang the saddle pad upside down on a fence, and spray the dirt and sweat off the underside of the pad before it dries and hardens. I also use a Strip Hair groomer to flick off the hair. Leave the pad out to dry in the sun. It should be soft and relatively clean in a few hours. If you add this to your daily routine, your pads will stay cleaner and go longer between real washes.
For a deep clean, try a pressure washer
If you have a farm, odds are you have a pressure washer. If not, you should! They're incredibly useful for cleaning pretty much everything...trailers, buildings, concrete floors, horse brushes, you name it. (Not the horses though!) I recently broke mine out and sprayed off all my saddle pads with just water. For some of the pads, I found the results almost miraculous.
Look at this Euro Eventer pad! I washed half of the underside and was so amazed at the results that obviously I had to take a picture. The crazy thing is that I don't use this pad often at all, so the dirt was old and well set. It had also already been washed in the machine. This is not fresh dirt coming off. Amazing!
I tried both the 40-degree and 25-degree nozzles. The 25-degree one was probably a little much and I did notice damage to some of the cheaper pads afterwards. If you go this route, be careful, start with lower pressure, and test it on your older or less-expensive pads first.
I soaked a few pads in Oxy Clean for a couple of hours before pressure washing and didn't really notice a difference between those pads and the others.
For tough stains, try Fels Naptha soap
You know those dark boot stains right behind the girth? Try pre-treating them with a bar of Fels Naptha soap. The old boot stains I treated with it didn't come out completely, but I was surprised how much things improved. I can't wait to try it on a fresher stain!
| Boot stain before Fels Naptha soap |
| Same boot stain after Fels Naptha soap |
| Show pad before cleaning |
| Show pad after soaking in Oxy Clean and pressure washing with just water |
I don't feel like I've mastered this because that white show pad is still not sparkling clean. How do people do that? Other things I'd like to try are spraying new pads with Scotch Guard before use and washing show pads immediately after the show (duh).
Subscribe to:
Posts (Atom)